
Workflow of 3D Visualizations
When in need of attractive marketing or presentation files, real estate developers, architects, interior designers, and marketing agencies are opting for 3D Visualization services. Highly realistic 3D images and 360-degree walk tours created by experience visualization artists are able to dramatically help potential clients and stakeholders to understand and appreciate the design, vision, and prospects of the particular project or property.
To make sure that the process of 3D Interior Visualization goes smoothly, and for our customers to have the maximum pleasure from the working process, to have confidence in the final product, 3D Visualization Studio creates a workflow, which perfects and polishes throughout the years.
Understanding that a lot of customers have never commissioned a project before or not sure of the processes, I have decided to dedicate this blog to our workflow, explaining in details a step by step process and hopefully answering your questions, such as: What are the steps involved in the 3D Interior Visualization project? What are the results that can be expected at each stage? How much control and changes can be expected in the process?
One of the biggest contribution from the side of the client towards the great results of the Interior 3D Visualisation in the shortest time with the minimum changes is to be aware of the major steps that go into the 3D Visualization process and to know what feedback is expected from them during each round.
Let’s start at the point where, you as a client has submitted a task with all the necessary information regarding the project (2D drawings, material examples, references, etc) and Studio starts the work on your 3D Interior Visualization Project.
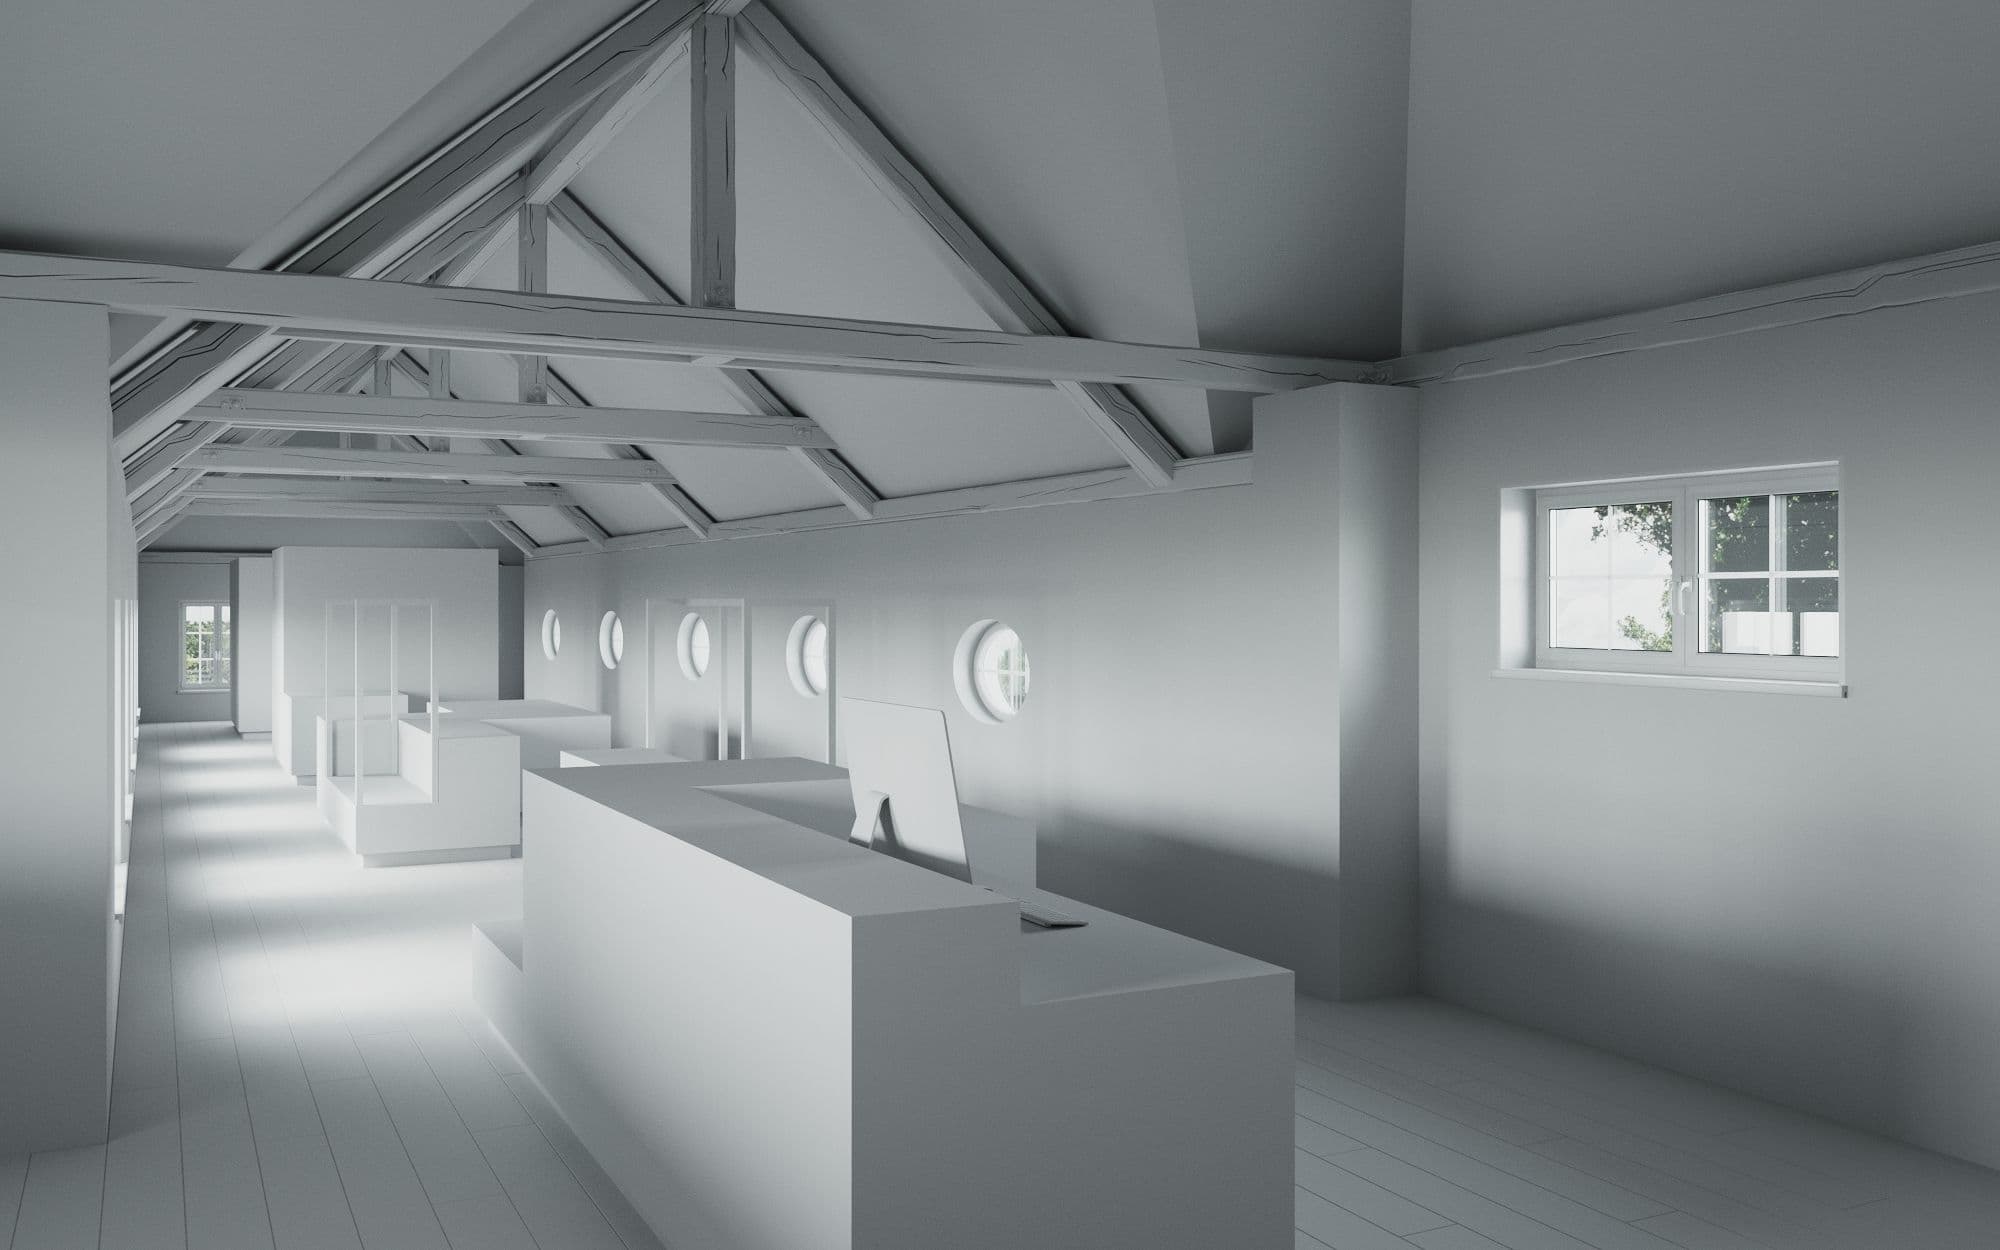
Step #1: Geometry and camera position
Once the Studio has received all the necessary files and started work on a project, you can expect the first preliminary results. It will be rendered in greyscale (also called “clay” or “grey material”) and submitted for the first approval. This stage is focused on main objects, elements, and camera position, but with no materials or colors. At this stage, you are expected to check and give your feedback about the geometry of the room, selection, and positioning of the furniture elements, as well as camera angles and heights.
After receiving your feedback 3D Visualization Artist will implement all the requested changes into the geometry of the scene and camera positioning to meet your requirements and will proceed to the next stage which is called “Materials and Light”.
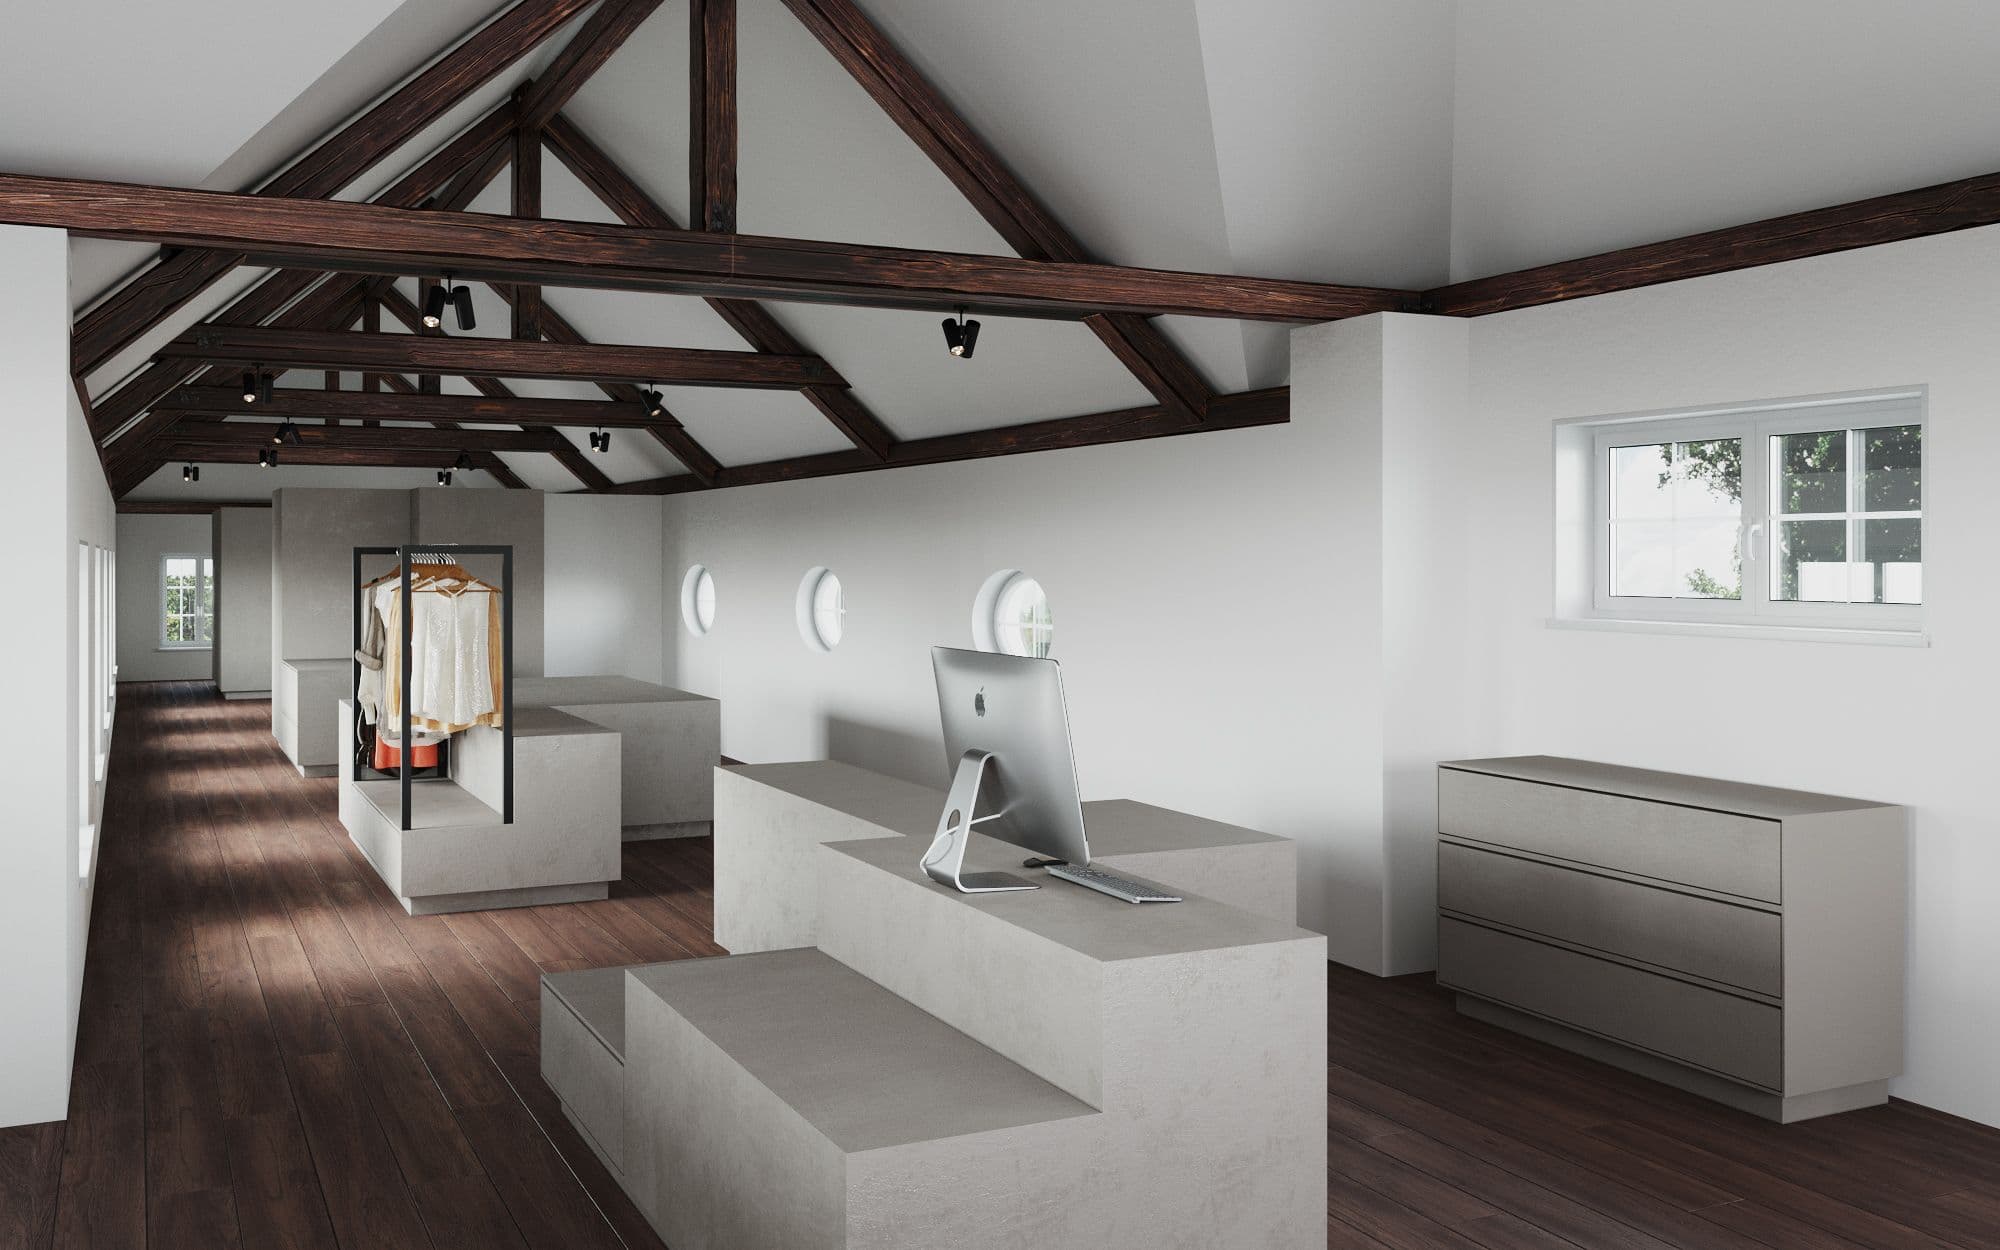
Step #2: Materials and Light
Once the changes according to your feedback are implemented in the grayscale scene, 3D Visualization Artist will start with the materials, textures, colors, and light. This is the moment where the scene comes to life and you will get a better understanding of how does the picture coming along. After you receive the render, you will be asked for feedback. You will check the changes which were done according to the previous feedback, as well as the lighting, materials, textures, and colors situation. In your feedback you will indicate all the corrections you would like to make in the scene.
After receiving your comments, all the necessary changes will be implemented and 3D Visualization Artist will move to Step #3.
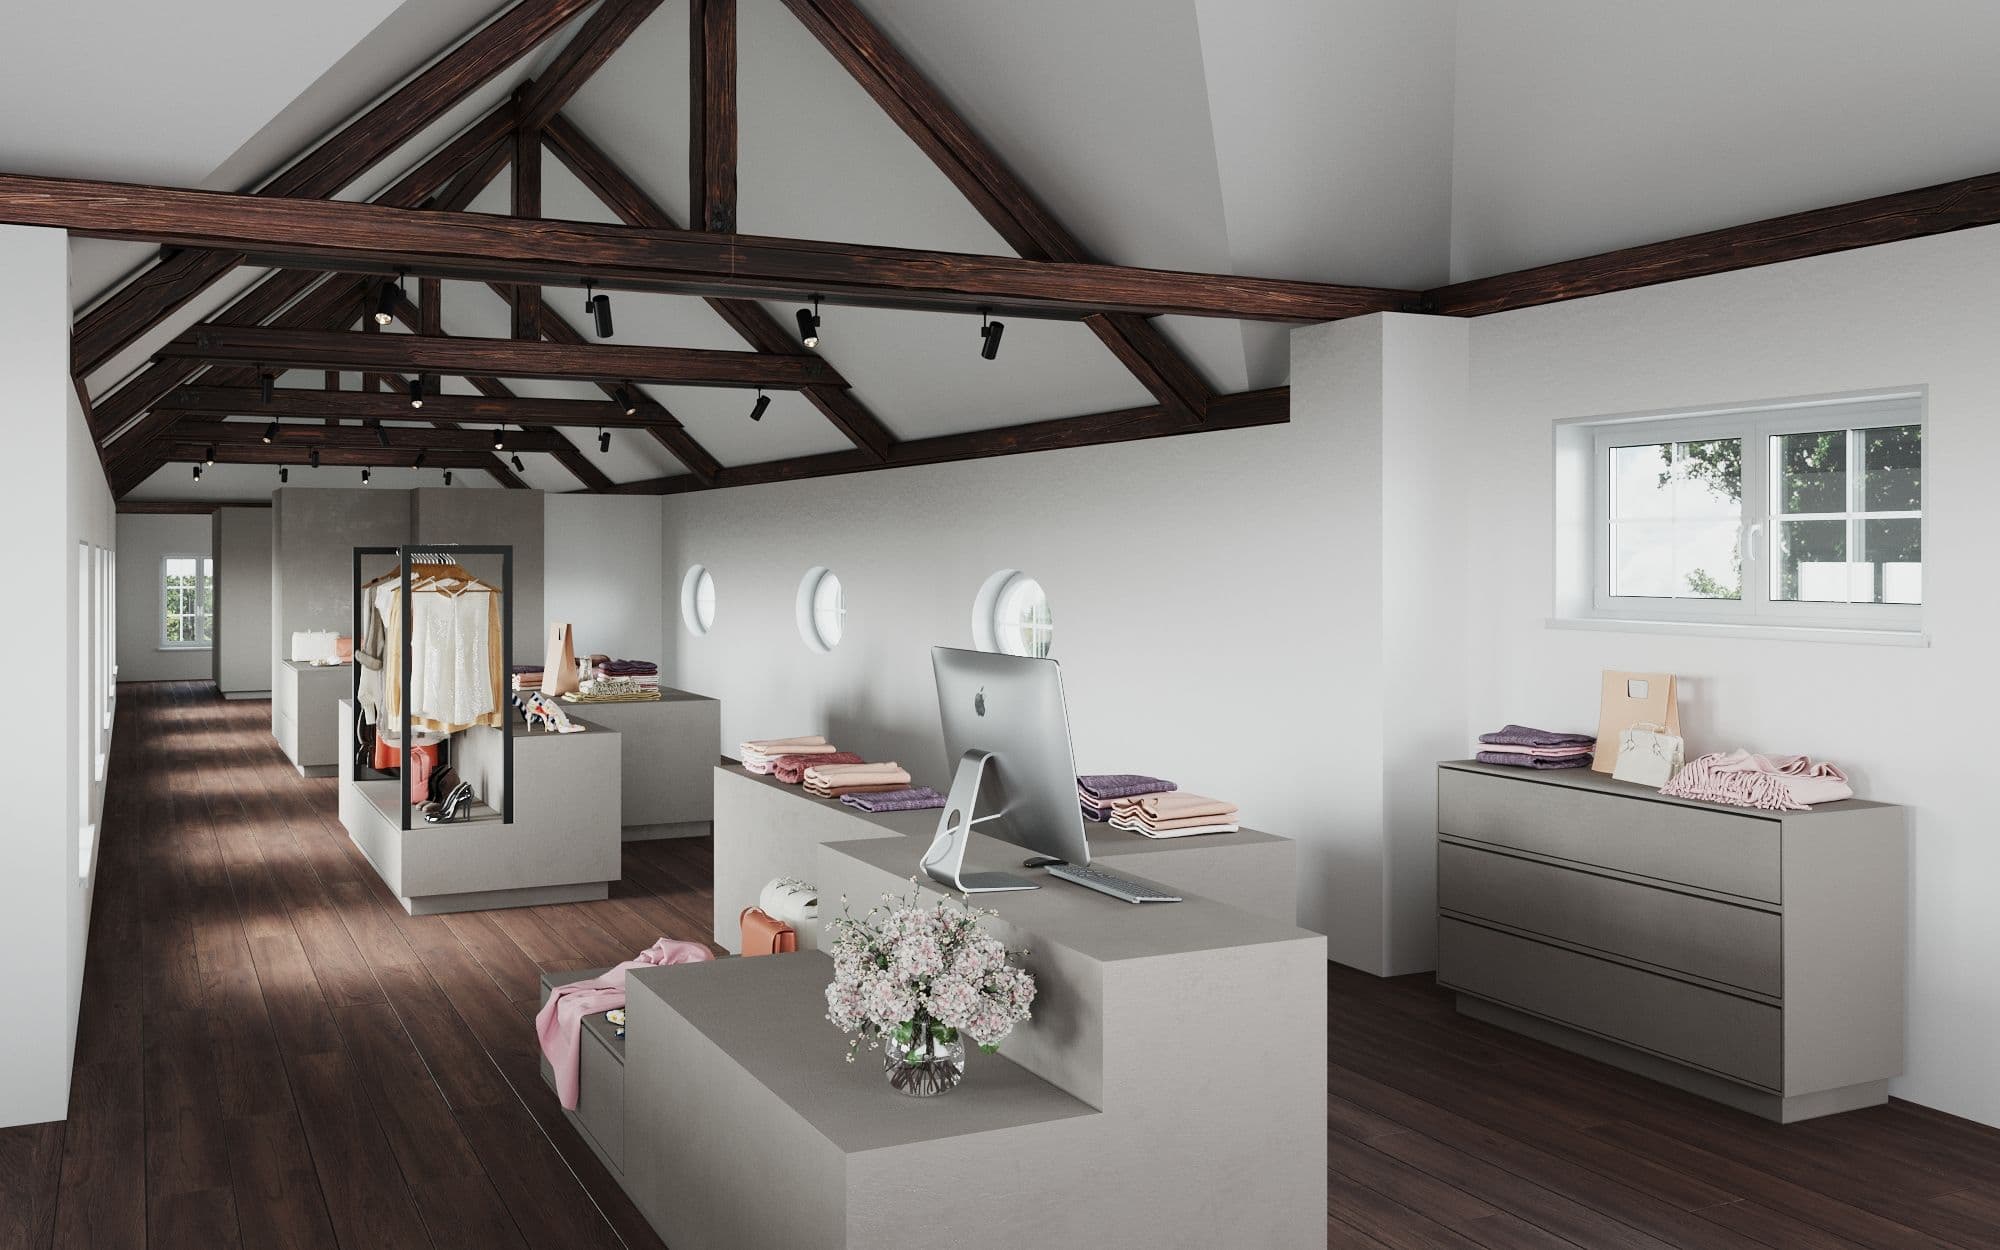
Step #3: Details
Once all the changes have been introduced, that’s the moment where the magic begins. It is time to add all the small details that make all the difference between good and great 3D Visualization. It brings life and cosines to the interior, the same as in real life. You will receive the image and will be asked for the last feedback. If you are satisfied with the result, the scene will be placed for the final render in the big resolution. There might be a situation, where you would want to make some minor changes in the details, which were chosen for the scene. In his case, these details will be changed and sent to you for final approval.
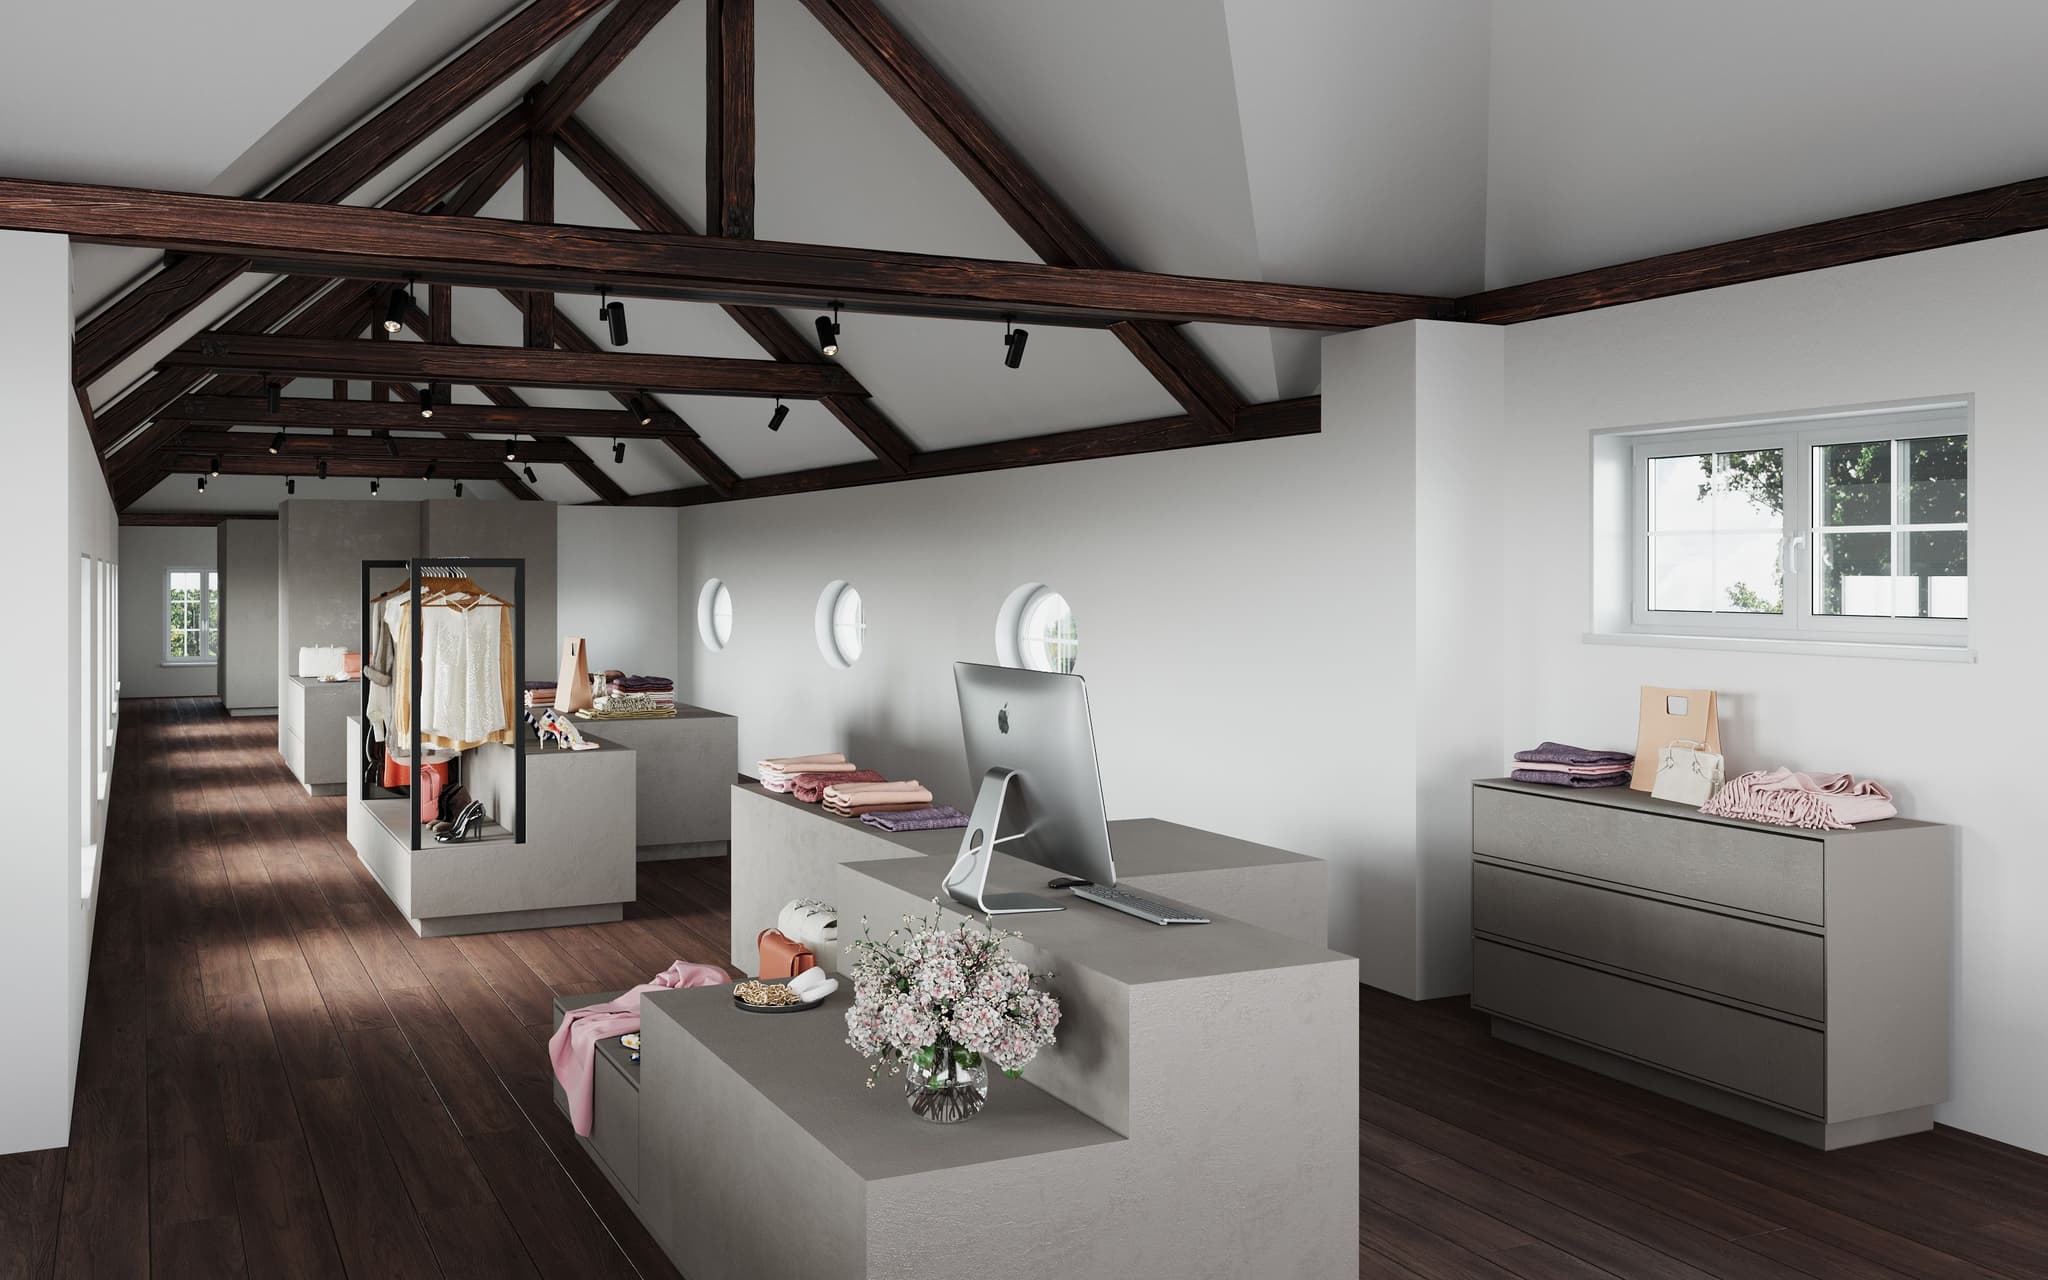
Step #4: Final Image
Once everything has been edited and changed, the final 3D Visualization will be sent to the final render. After receiving a row file, the 3D Visualization Artist will make post-production, adjust a color balance, brightness, and contrast in Photoshop. Once the editing is done, the client will receive the final files in the 3K resolution in JPG/PNG format, which is suitable to print in the A1 format. Of course, the resolution of the image is done higher or lower upon the client's request.
Once you have the final image, you can provide your feedback on the collaboration process and the final work. This will help 3D Visualization Studio to improve processes even further.
Of course, it is just a main processes guide and it can be changed if needed for the specific project.
Now that you know all the main steps of the 3D Visualization collaboration process between the customer and 3D Artist, you are well-positioned to get the best efforts and results from your 3D Visualization partner. If you are ready to try professional 3D Visualization services for your next project, do get in touch with us and we will provide you with the quote as soon as possible.
